- Option 1: URL where a Rive file is hosted
- Option 2: Add the asset to the asset bundles of the native iOS and Android projects
- Option 3: Add the asset to the asset bundles in an Expo project using
expo-asset - Option 4: Source prop and require
<Rive /> component, you must supply the url or resourceName prop respectively to the options above, or your component will fail to load.
Read more below to see more on each of the options.
Option 1: URL
url parameter when instantiating the <Rive /> component.
Option 2: Asset Bundle
<Rive /> component is to reference the name of the resource/asset in the respective ios/ and android/ projects.
Adding to iOS
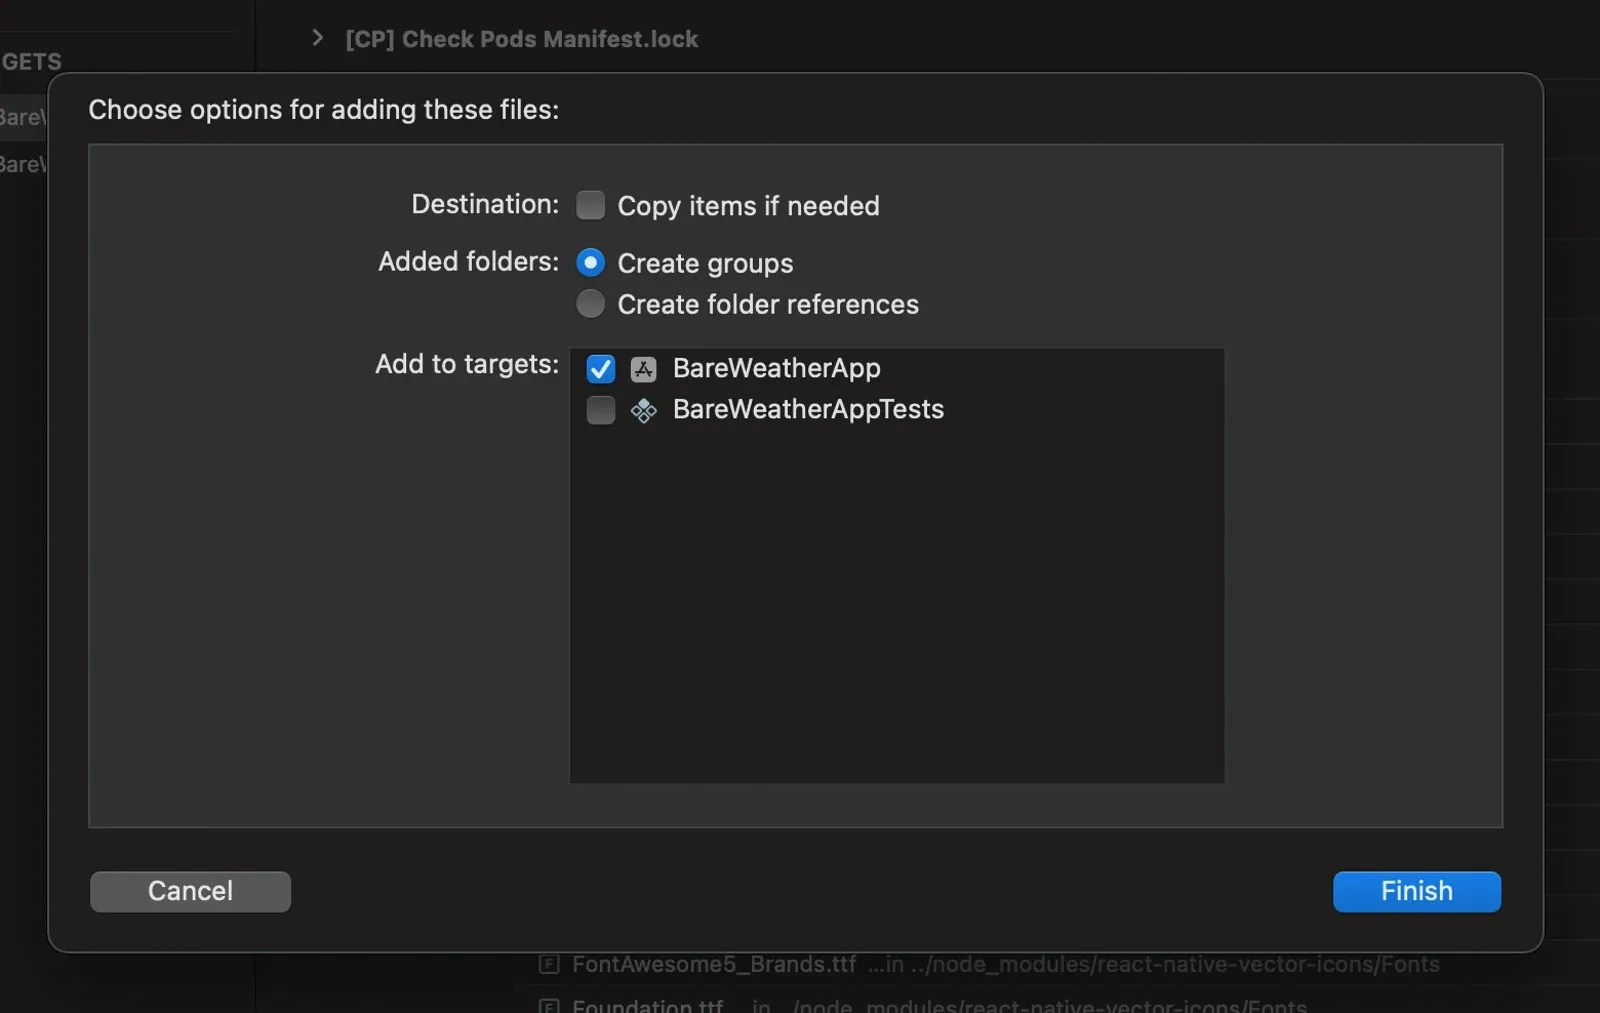
In theios/ folder of your React Native project, open the .xcodeproj file in XCode. This will open up the native iOS project.
Create a New Group under the root of this project and name it whatever asset folder name you’d like to give it (i.e., Assets). Drop your .riv file into this group, and when prompted by XCode, add it to the Target of your app. This ensures that the Rive file gets included in the bundle resources.
Adding to Android
In theandroid/ folder of your React Native project, open the whole folder in Android Studio. This will open up the Android project.
Under the /app/src/main/res/ directory, create a new Android Resource Directory, which is where you’ll store Rive file assets, and when prompted to select a name for the folder and resource type, select raw from the resource type dropdown. Drop your .riv file into this new folder; this ensures that the Rive file gets included in the bundle resources.
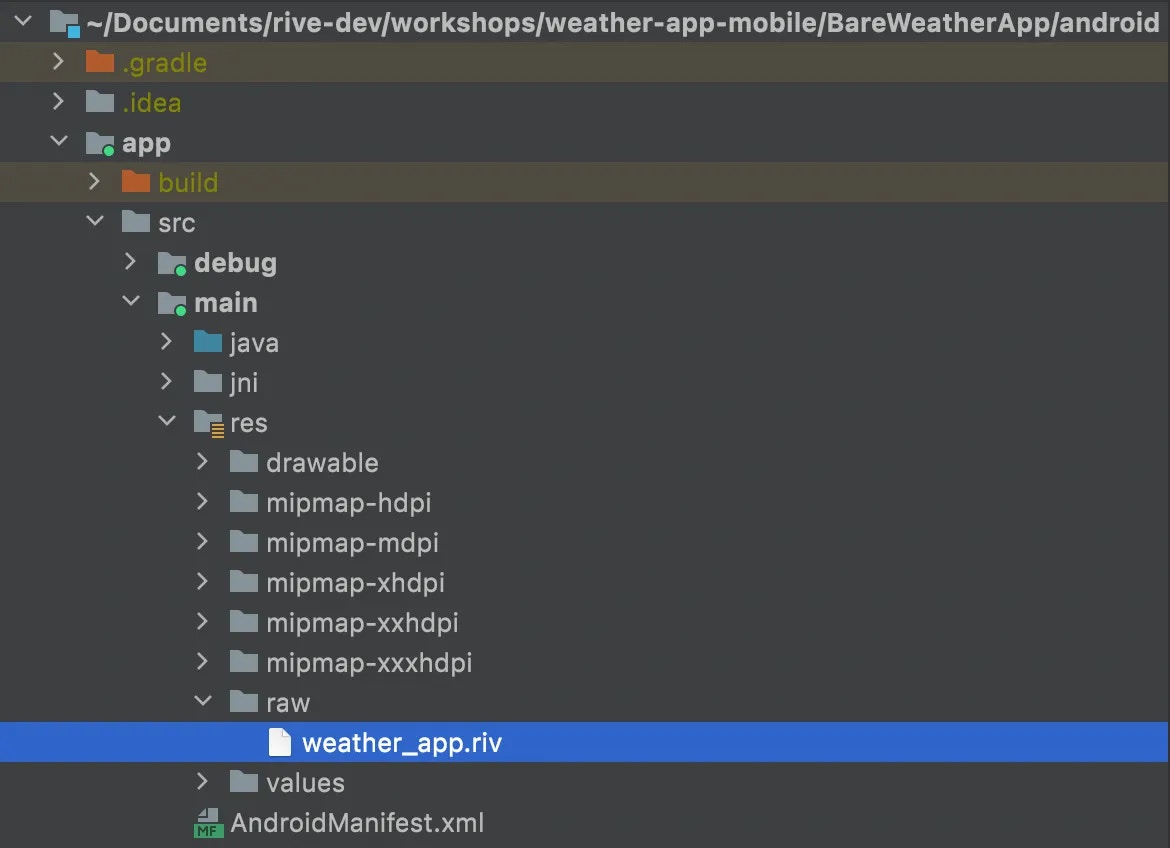
weather_app.riv to the Android project
Once the Rive files are added to the asset/resource bundles of the iOS and Android projects in the React Native app, you should be free to start referencing the name of the file (without the .riv extension) when creating the <Rive /> component, using that resourceName prop.
Option 3: Using expo-asset with Expo CNG
.riv files into your native builds.
In your app.json or app.config.js, add the expo-asset plugin and specify your .riv files or asset directories:
metro.config.js.
If you don’t already have this file, generate it with:
npx expo prebuild first if you’re using any expo run:* commands.
If you’re using an earlier version of Expo, you can find an alternative approach in this Github Issue.
Option 4: Source Prop with Require
source prop with require() to load the Rive file by referencing its path.
To make this work, ensure your metro.config.js supports .riv files.
If you’re using Expo and don’t already have this file, you can generate it with: